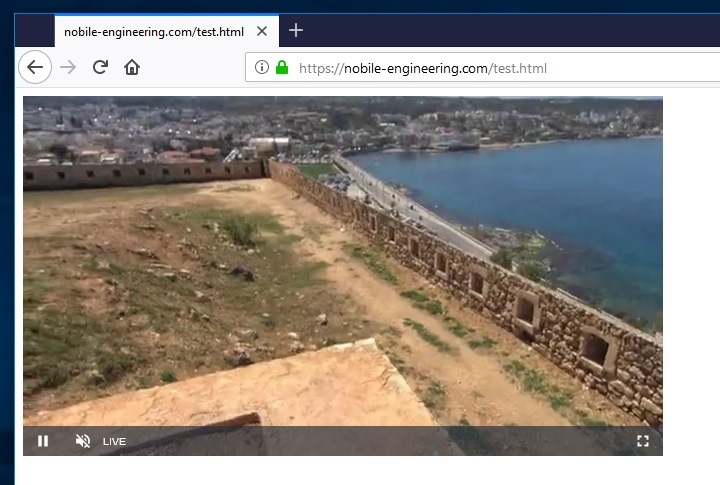
You have set up a video processing pipeline or simply have a camera attached to a Raspberry Pi and want to be able to watch the video from a browser?
Streaming live video can be done using several protocols, among the most popular we have HTTP, RTMP and RTSP.
HTTP is the most widely used protocol to serve static video but can also be used for live content.
RTMP was initially developed by Macromedia (Adobe) to enable streaming of audio and video between a server and a Flash player and is a TCP-based protocol.
RTSP (Real Time Streaming Protocol) was developed by RealNetworks, Netscape, and Columbia University and is not supported natively by most browsers.
Ideally the solution would enable anyone with a working browser, including smartphones and tablets, to be able to consume the video. A good option is to use HTTP Live Streaming (HLS). HLS was developed by Apple Inc. and according to Wikipedia:
“works by breaking the overall stream into a sequence of small HTTP-based file downloads, each download loading one short chunk of an overall potentially unbounded transport stream. A list of available streams, encoded at different bit rates, is sent to the client using an extended M3U playlist.”
By being based on standard HTTP, it is not being blocked by firewalls or proxys that let standard HTTP traffic go through. The drawback is the relatively high latency compared to other protocols.
The solution proposed here is to use the RTMP protocol to send the stream form the camera to the cloud and then convert it to HLS using NGINX. If you want to use Apache or another web server to serve the stream this can be done easily.
NGINX has a very nice rtmp module that is perfectly suited for the task. In order to use it we are going to build NGINX with support for it.
$ sudo apt-get install build-essential libpcre3 libpcre3-dev libssl-dev
$ git clone git://github.com/arut/nginx-rtmp-module.git
$ wget http://nginx.org/download/nginx-1.12.0.tar.gz
$ tar xzf nginx-1.12.0.tar.gz
$ cd nginx-1.12.0
$ ./configure --with-http_ssl_module --add-module=../nginx-rtmp-module
$ make
$ sudo make install
This will install NGINX in /usr/local.
To start the service
$ sudo /usr/local/nginx/sbin/nginx
while to stop it:
$ sudo /usr/local/nginx/sbin/nginx -s stop
If you are using already a web server, it’s better to modify the nginx configuration file before starting it.
Open the file “/usr/local/nginx/conf/nginx.conf” with an editor and enable RTMP and HLS following the example below (note that i used the user www-data since I have apache installed that uses www-data as user):
user  www-data;
worker_processes  1;

error_log  logs/error.log debug;

events {
    worker_connections  1024;
}

http {
     sendfile off;
     tcp_nopush on;
     directio 512;
     default_type  application/octet-stream;
     server {
        listen       localhost:2222;
        server_name  $hostname;

        location / {
                root /var/nginx_www;
                index index.html;
        }
        location /hls {
        # Disable cache
        add_header Cache-Control no-cache;

        # CORS setup
        add_header 'Access-Control-Allow-Origin' '*' always;
        add_header 'Access-Control-Expose-Headers' 'Content-Length';

        # allow CORS preflight requests
        if ($request_method = 'OPTIONS') {
            add_header 'Access-Control-Allow-Origin' '*';
            add_header 'Access-Control-Max-Age' 1728000;
            add_header 'Content-Type' 'text/plain charset=UTF-8';
            add_header 'Content-Length' 0;
            return 204;
        }

        types {
            application/vnd.apple.mpegurl m3u8;
            video/mp2t ts;
        }

        root /tmp/hls;
        }

        # rtmp stat
        location /stat {
            rtmp_stat all;
            rtmp_stat_stylesheet stat.xsl;
        }
        location /stat.xsl {
            # you can move stat.xsl to a different location
            root /usr/build/nginx-rtmp-module;
        }

        # rtmp control
        location /control {
            rtmp_control all;
        }

        error_page   500 502 503 504  /50x.html;
        location = /50x.html {
            root   html;
        }
    }
}

rtmp {
    server {
        listen localhost:1935;
        ping 30s;
        notify_method get;

        application live {
            live on;

            # sample HLS
            hls on;
            hls_path /tmp/hls;
            hls_sync 100ms;
            hls_fragment 3;
            hls_playlist_length 60;
            allow play all;
        }
    }
}
With this configuration both the http server and the rtmp servers will listen on localhost with the http on port 2222 and rtmp on the standard 1935.
The HLS files and playlist will be generated and put in “/tmp/hls” (specified by hls_path /tmp/hls;)
To push the stream to the server from a device we can use an ssh tunnel on the port 1935 and map the device-local port 1935 to the remote server port 1935
$ ssh -L1935:remoteserver:1935
To make the stream accessible by a browser there is a javascript video player video.js that can be embedded in a normal html page.
<!DOCTYPE html>
<html lang="en">
  <head>
    <link href="https://vjs.zencdn.net/7.1/video-js.min.css" rel="stylesheet">
    <script src="https://vjs.zencdn.net/7.1/video.min.js"></script>

  </head>
  <body>
      <video id="player" class="video-js vjs-default-skin"  controls >
        <source src="http://remoteserver.com/hls/mystream.m3u8" type="application/x-mpegURL" />
      </video>

  <script>
    var options, video;

    options = {
      autoplay: true,
      muted: true
    };

    video = videojs('player', options);

  </script>

  </body>
</html>
the line with
<source src="http://remoteserver.com/hls/mystream.m3u8" type="application/x-mpegURL" />
tells the player where the stream source is located.
In NGINX the rtmp application is called live and the name of the .m3u8 file is mystream.m3u8.
This must match the published rtmp stream url
rtmp://localhost/live/mystream
Since the stream is composed by regular files that are video fragments, it’s sufficient to expose the directory that contains them to the outside world. For example by creating an alias with apache2, inside the virtualhost conf put
Alias /hls "/tmp/hls"
<Directory "/tmp/hls">
Options FollowSymLinks
AllowOverride All
Order allow,deny
Allow from all
Require all granted
</Directory>
and ensure that the directory /tmp/hls is accessible by the user with which apache executes.
The example working with apache and the opencv + ffmpeg + rtmp streaming example program to generate the stream

Happy streaming!!!
